With AyaNova 4 and higher versions, check out the report template feature that can automatically “suck” out the client’s email address if attaching a detailed workroder report to an email, without having to copy it from the client entry screen.
If you have a new installation of AyaNova 4, you will see this in the Sample Detailed Service Workorder with Grand Total report template, or if you have upgraded to AyaNova 4, you can edit your detailed workorder report templates to take advantage of this feature.
To see how this was edited:
-
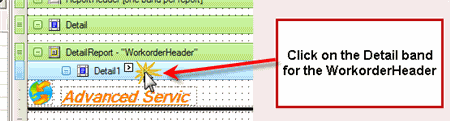
Open a detailed report template from a workorder in the report designer. For example, open a workorder, select Print, hold down the SHIFT key from your keyboard and select Sample Detailed Service Workorder with Grand Total whic hopens this report template in the report designer)
-
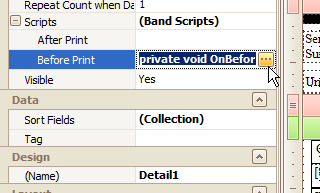
Click on the Detail band for the WorkorderHeader
-
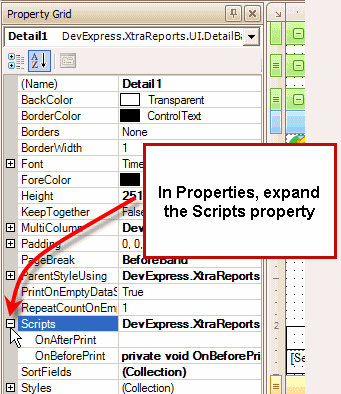
Expand the Scripts property for this band
-
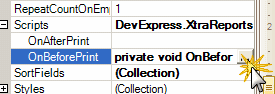
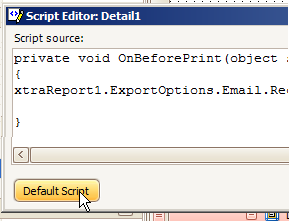
Open up the OnBeforePrint script (in this screenshot it already has the script entered - this is to show you where the script needs to be placed)
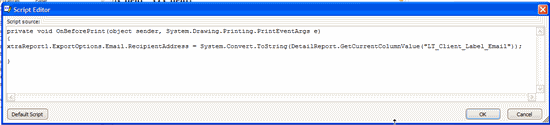
- The script as shown is
private void OnBeforePrint(object sender, System.Drawing.Printing.PrintEventArgs e)
{
xtraReport1.ExportOptions.Email.RecipientAddress = System.Convert.ToString(DetailReport.GetCurrentColumnValue(“LT_Client_Label_Email”));
}
-
Save the report template.
-
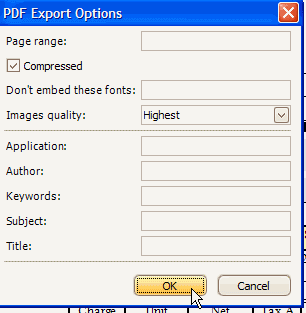
Now from the workorder entry screen, select Print this detailed report template. When the Print Preview opens, select on the Email menu option. IN our screenshots below, we selected the attachment to be a PDF
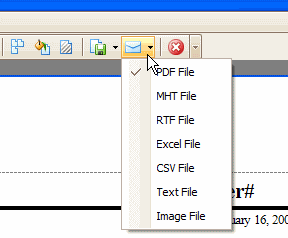
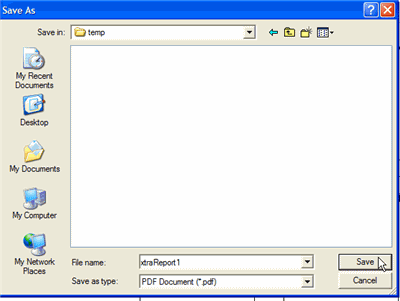
- Save the attachment as a file to your hard drive. You can name the attachment anything you want.
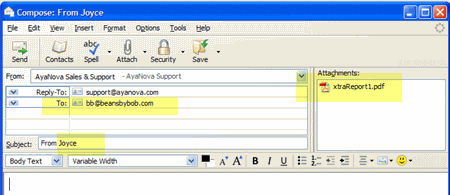
- Your default email program will open up, automatically entering the client’s email address into the TO: field, automatically attaching the report template, and the Subject: will automatically have your computer login name. You can edit as needed now, as well as include your message to your client.
Do note that this feature is available when Print Previewing for a single workorder from that workorder’s entry screen.
NOTE: There has been a change in the latest version DevExpress printing control for this feature that is used with AyaNova 5.x
To automatically have the email address of the client placed into the TO: of the email message when sending a report as an attachment, the OnBeforePrint script in an AyaNova 5 report template needs to be placed in the OnBeforePrint of the ReportHeader band NOT the Detail1 band.
For example:
-
Open a service workorder for a client that has an email address entered in their client entry screen (such as ABC Accounting if using the sample data)
-
Open the sample report template Sample Detailed Service Workorder with Grand Total in the report designer (hold the SHIFT key on your keyboard while selecting Print -> Sample Detailed Service Workorder with Grand Total )
-
Click on the Detail1 band to select it, and view the OnBeforePrint property for this band
-
As this is no longer used with the printing control with AyaNova 5, you can set this back to its default script
-
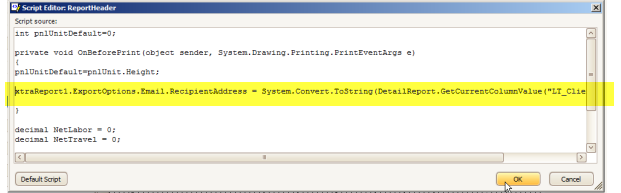
Now click on the ReportHeader band to select it
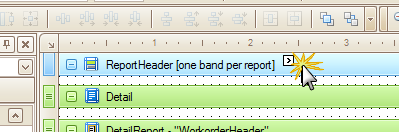
- View the OnBeforePrint script property for this band, and add to it the line below so that it is between the two { } as per the screenshot below
xtraReport1.ExportOptions.Email.RecipientAddress = System.Convert.ToString(DetailReport.GetCurrentColumnValue(“LT_Client_Label_Email”));
- Test by Print Preview, select Send via Email… select PDF, and this client’s email address will now show in the TO: field in the email message you send along with the report as an attachment.
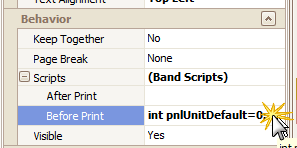
ADDITIONAL: With AyaNova 5, you can instead have the following script in the OnBeforePrint band of the detail band for the WorkorderHeader that has the following
private void OnBeforePrint(object sender, System.Drawing.Printing.PrintEventArgs e)
{
DetailBand detail = (DetailBand)sender;
XtraReport report = (XtraReport)detail.Report.Report; // <---- UPDATE THIS LINE depending on what band the script is in
report.PrintingSystem.ExportOptions.Email.RecipientAddress = System.Convert.ToString(DetailReport.GetCurrentColumnValue(“LT_Client_Label_Email”));
report.PrintingSystem.ExportOptions.Email.Subject = “Report for Workorder #” + (System.Convert.ToString(DetailReport.GetCurrentColumnValue(“LT_O_Workorder”)));
}
The above script will place the client’s email address into the TO: field in the email message, as well as place the text “Report for Workorder #” and the actual workorder number of the report.

Wanted to post here for those that use this handy little reporting/emailing feature:
Email will not be sent correctly if the client’s Email field has multiple addresses.
This is not yet an ability with the reporting engine to be able to send to multiple addresses. It is on this third party’s component to add as a possible feature, but not yet available.
Update to the latest AyaNova 7.2 which includes resolution for this.
Just make sure to use either a comma OR a semi-colon as the dividing between multiple email addresses
