Full Update to AyaNova v3.6.0.0 if using default stand-alone configuration
If you are presently using AyaNova v3.0.1 or higher, you may follow these instructions
If using AyaNova 3.5.0.0, you may instead refer to the QuickFix instructions
If you are using AyaNova CE 1.9.4.4, please refer to the AyaNova FAQ Answers for AyaNova CE 1.9.4.4 users
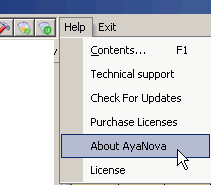
Check what version you are presently running by selecting menu Help -> About AyaNova
<o:p>
THIS UPDATE AFFECTS ALL AYANOVA 3 PRODUCTS AND UTILITIES, NO SINGLE ITEM CAN BE UPGRADED WITHOUT UPGRADING THE OTHERS
Below are specific instructions for stand-alone default installation. Read through all instructions for your type of setup before proceeding.
If you have a question, post a question on the AyaNova Support Forum, or email us directly at ersonName w:st=“on”>support@ayanova.comersonName> before proceeding.
Provide details on your configuration if asking a question so that we may help you as fast as possible with an understanding of your configuration.
+++++++++++++++++++++++++++++++++++++++++++
Before starting, make sure you can see all information in Windows Explorer by performing the following:
-
Open Windows Explorer and select menu View
-
Make sure Details is checked
-
Select menu option Tools -> Folder Options
-
Select tab View
-
Make sure Show Hidden Files and Folders is checkmarked
-
Make sure Hide file extensions for known file types is not checkmarked
-
Click on Apply button
-
Click on Use Current Folder button to set all folders to use this type of view
-
Select Yes
Now you can see file dates, extensions of files and so on.
++++++++++++++++++++++++++++++++++++++++++
If presently using default stand-alone installation:
- Make and confirm a successful backup of your AyaNova v3 database THIS IS EXTREMELY IMPORTANT
a. Close AyaNova v3 and any other AyaNova v3 programs (QBI, etc) and make a backup of the AYANOVA.FDB file to another location (backup device, etc)
b. How to backup is also found in the AyaNova v3 Manual section “Backing Up Using the Embedded Firebird Server(Default Installation)” starting on page 585
- Via Control Panel -> Add/Remove Programs un-install all AyaNova v3 related programs with the AyaNova program un-installed last.
a. For example, if you also use QBI, uninstall QBI first, than un-install AyaNova v3
3. Open Windows Explorer, and move to the AyaNova 3 program directory, and delete all remaining files in this folder except for the AYANOVA.FDB file.
a. It is recommended that you ensure you are seeing all files and all extensions by setting the following Windows Explorer settings
In Windows Explorer - select Tools -> Folder Options -> select View Tab -> make sure Hide File Extensions for Known File Types is not checked
In Windows Explorer - select Tools -> Folder Options -> select View Tab -> make sure Show Hidden Files & Folders is checked
b. AYANOVA.FDB is your database that holds your data and the license keycode.
C. Rename your database from AYANOVA.FDB to AYANOVA.FDB.MINE
If using Vista with a default stand-alone installation of AyaNova - do not rename the database to AYANOVA.FDB because of the “virtualization” aspect of Vista (see forum topic http://forum.ayanova.com/Topic2769-90-1.aspx
4. Confirm you have Microsoft.NET Framework 2 or higher installed
a. Open Control Panel -> Add/Remove Programs
b. Scroll down and confirm you have Microsoft.NET Framework 2 or higher installed (note the version 2 - not 1.1 or 1.1.SDK, or 2 SDK - but 2 is needed)
c. If you do not have Microsoft.NET Framework 2 installed, download from http://www.microsoft.com/downloads/details.aspx?familyid=0856eacb-4362-4b0d-8edd-aab15c5e04f5&displaylang=en and follow the installation instructions provided by Microsoft.
d. Be sure to reboot after installing before proceeding.
5. Download the latest AyaNova 3.6.0.0 Setup file
- Run the AyaNova 3 installation, installing to the same directory where the previous AyaNova 3 was installed (default location is C:\Program Files\Ground Zero Tech-Works Inc\AyaNova 3)
a. Be logged into the computer itself as the computer’s Administrator
b. Be sure to checkmark Everyone as to who can access the program.
7. Once the AyaNova 3 installation is complete, we will now replace the trial database with your original database (If using Vista, no need to do this step because you did not rename the AYANOVA.FDB file):
a. Open Windows Explorer and move to the AyaNova 3 installation folder (default location is C:\Program Files\Ground Zero Tech-Works Inc\AyaNova 3)
b. Rename the file AYANOVA.FDB to AYANOVA.FDB.TRIAL
c. Rename the file AYANOVA.FDB.MINE to AYANOVA.FDB
If using Vista, no need to do the above step because you did not rename the AYANOVA.FDB file
8. Now that your database is back:
a. Run the AyaNova program by double-clicking on the AyaNova 3 icon on your desktop
b. Make sure you first log in as the AyaNova Administrator - (default username is manager with password letmein if you have not changed this)
c. Only log in the first time as the AyaNova Administrator
d. Confirm your data displays
e. The AyaNova update is completed on this computer
9. If the login screen appears with the manager username and password already pre-entered, that means you did not perform step 7, or it means you will need to restore your database file AYANOVA.FDB from step 1.
a. Exit out of the AyaNova program
b. Perform step 7 if you did not do it
c. If your AYANOVA.FDB file was overwritten, you will need to restore your original AYANOVA.FDB from backup.
i. Rename the existing AYANOVA.FDB file as AYANOVA.FDB.ORG
ii. Restore from backup the AYANOVA.FDB file you had backed up as per the very first step of these instructions.
iii. Repeat step 8
10. Download the latest revision of the AyaNova v3 Manual that includes information about the new features, as well as updated information.
-
If you previously were running QBI v3, uninstall your QBI v3 installation, download the latest QBI v3 installation file and repeat the installation and configuration instructions again.
-
If previously were running PTI v3, uninstall your PTI v3 installation, download the latest PTI v3 and repeat the installation and configuration again.
Refer to the Issues Addressed & New Features topic in this Known Issues & Updates section of the forum for an outlined of new features and issues.